#### Q1: Why is there a gray border around the image displayed by my projector?
This gray border is a characteristic of projectors that use DLP (Digital Light Processing) technology. It occurs due to the design of the DMD (Digital Micromirror Device) used to adjust the image. The edges of the DMD have an inactive area, and when light hits this area, it creates a gray border around the image.
#### Q2: Can the gray border be minimized or removed?
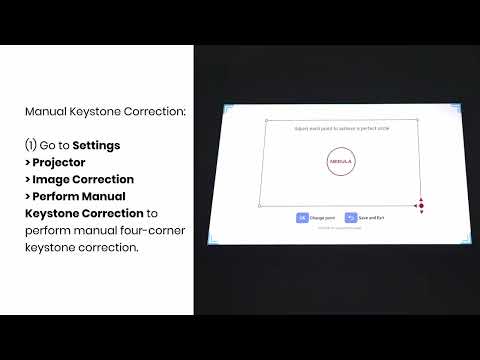
Yes, the gray border can be minimized. One way to reduce it is by disabling automatic keystone correction and using manual keystone correction instead. This will make the gray border narrower.
#### Q3: What is keystone correction and how does it affect the gray border?
Keystone correction adjusts the image to appear rectangular when the projector is not perfectly aligned with the screen. This process essentially crops the tilted image into a normal rectangular shape, which increases the inactive area on the DMD. As a result, the gray border becomes more noticeable. By turning off keystone correction and positioning the projector directly in front of the screen, the gray border can be reduced.
#### Q4: Is the gray border a defect or a normal feature?
The gray border is a normal feature and an inherent characteristic of the DMD system used in DLP projectors. It is not a defect but rather a result of the technology's design.
#### Q5: Will the gray border affect the overall viewing experience?
The gray border is typically very narrow and should not significantly affect the overall viewing experience. However, if it is bothersome, adjusting the projector's position and settings as mentioned above can help minimize its visibility.
#### Q6: Are there any other solutions to reduce the gray border?
Aside from adjusting the keystone correction and projector placement, there are no other solutions to completely eliminate the gray border, as it is a fundamental aspect of the DMD technology. However, ensuring that the projector is properly aligned with the screen can help in minimizing its impact.
If you still have any questions, please contact Support@seenebula.com for further assistance.